Follow this step-by-step guide to configure SHOUTcast DSP with Winamp for live audio streaming with your Primcast SHOUTcast server. Get your radio station live in minutes.
Follow each step carefully to configure SHOUTcast DSP for live audio streaming with your Primcast server credentials.
The following software is required to stream with SHOUTcast DSP:
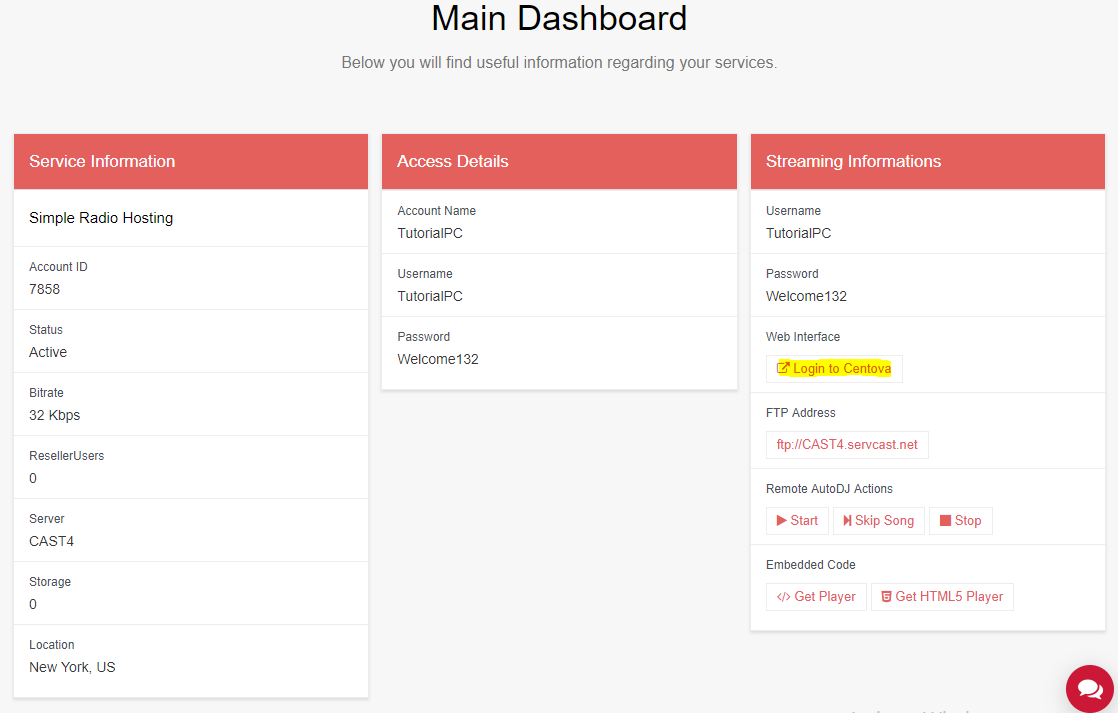
After installing both, log in to your Primcast account and click Login to Centova to access your SHOUTcast station panel.
 Expand
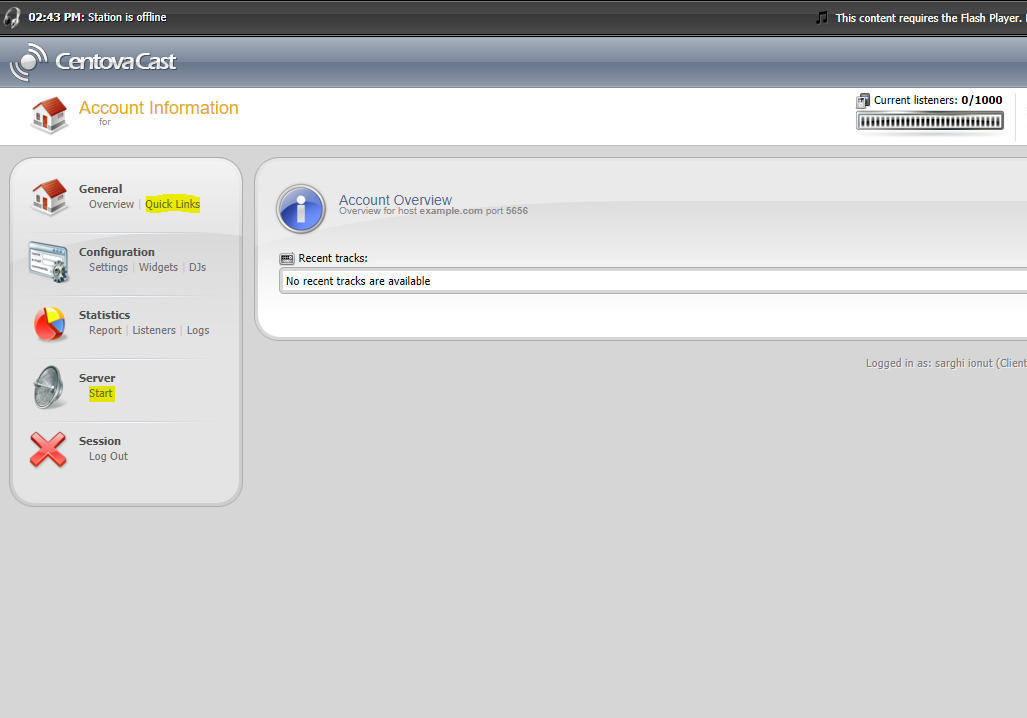
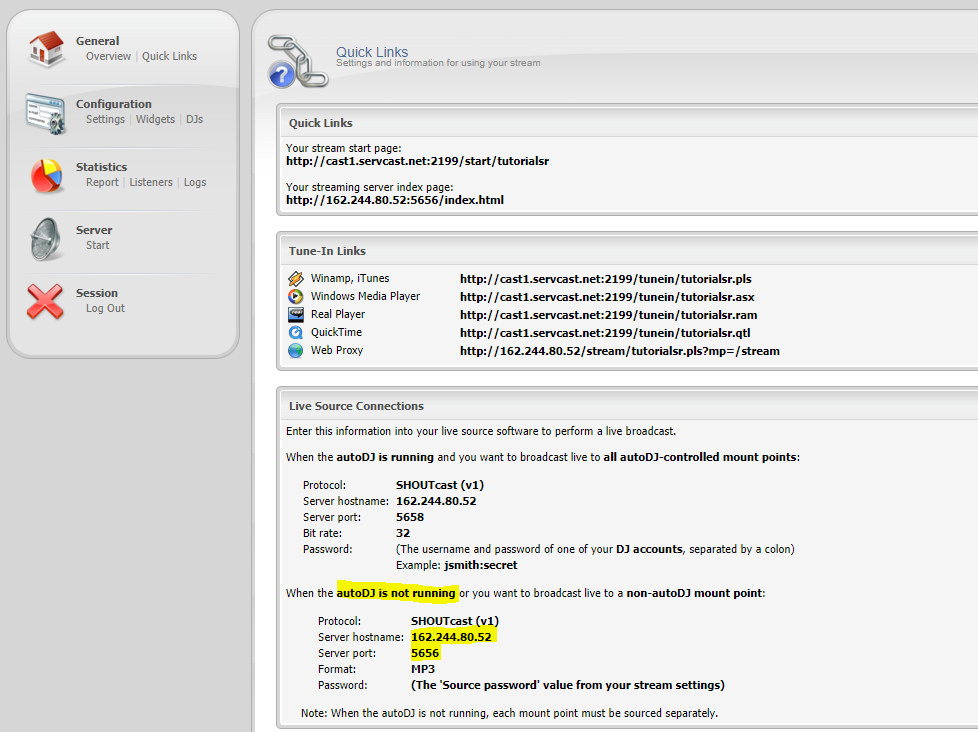
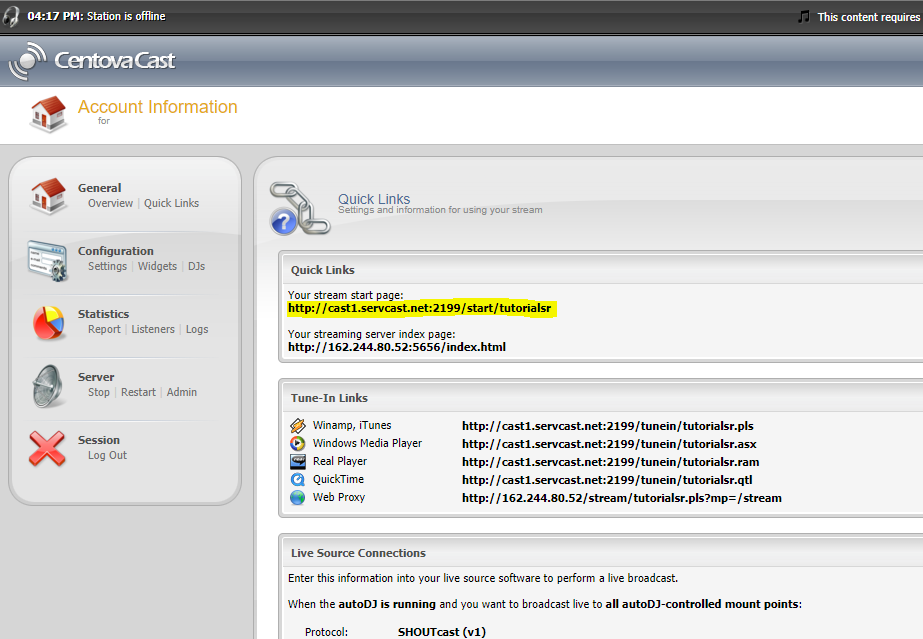
In the Centova panel, click Start from the left menu to power on your SHOUTcast station, then click Quick Links. Scroll down to Live Source Connections to find your Server Hostname and Server Port.
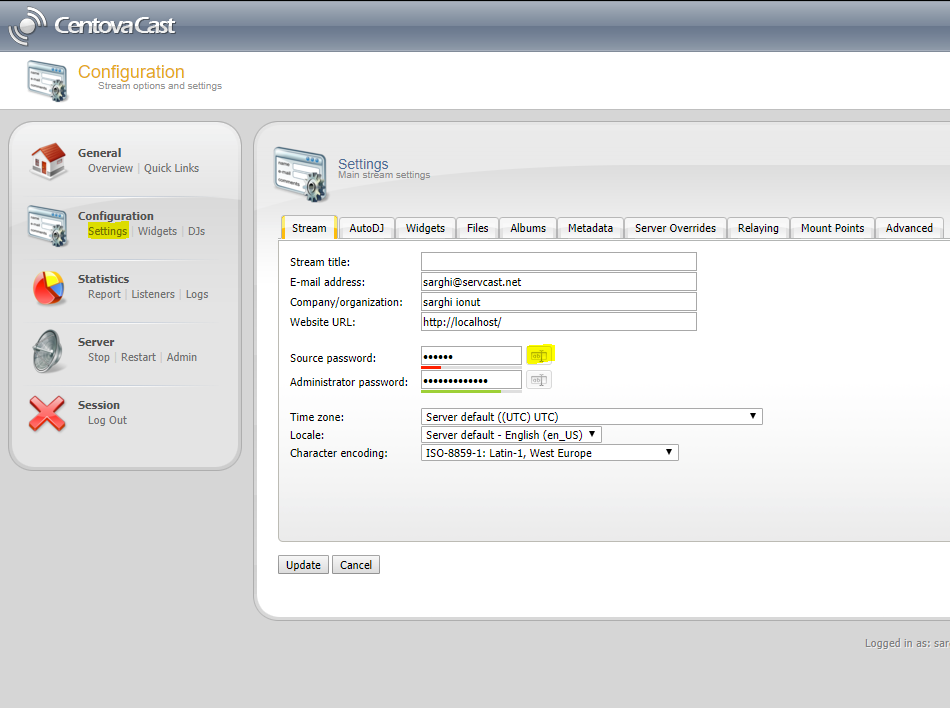
To retrieve your Streaming Password, go to the Settings section and click the reveal button next to the source password field.
 Expand
 Expand
 Expand
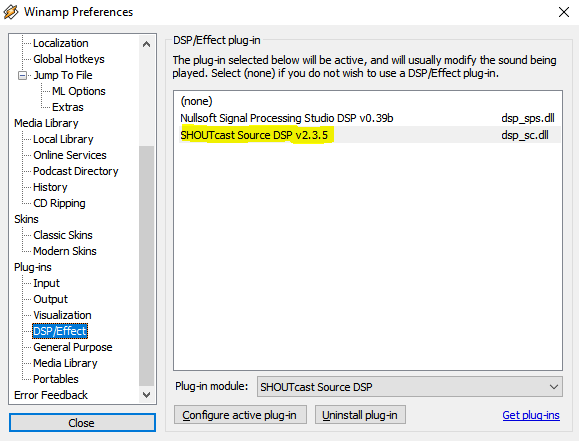
Open Winamp and press Ctrl+P to open Preferences. Go to DSP/Effect and double-click SHOUTcast Source DSP v2.3.5.
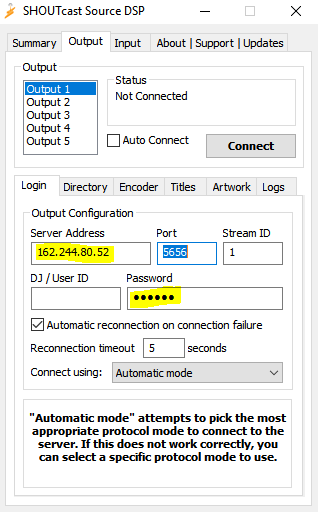
In the DSP window, enter your Server Hostname, Port, and Streaming Password (leave the Username field blank). Set Reconnection Timeout to 0 if you want automatic reconnection on disconnect.
 Expand
 Expand
 Expand
 Expand
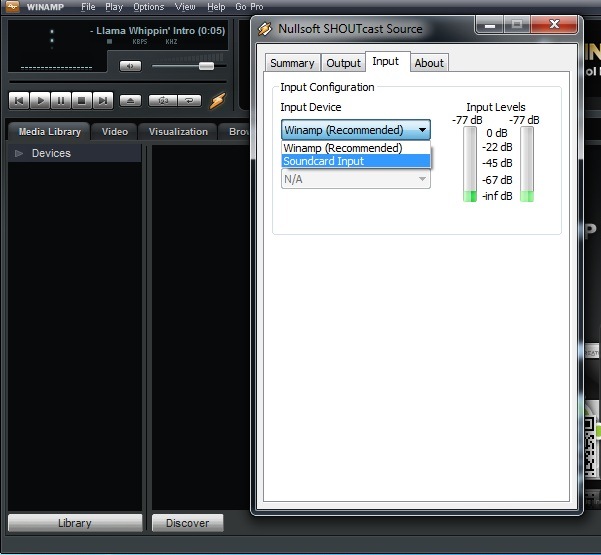
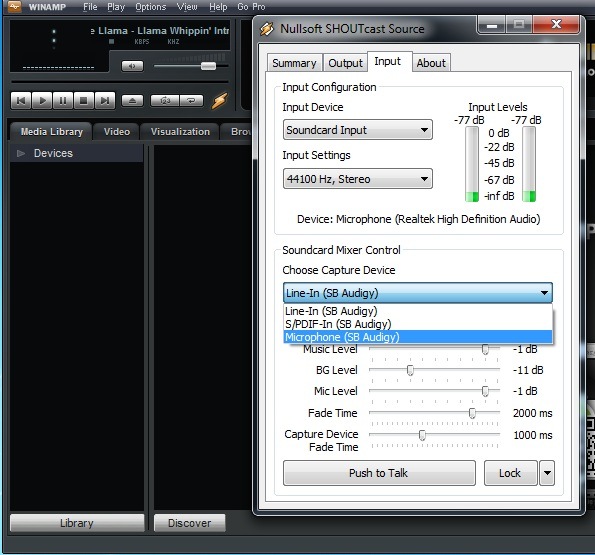
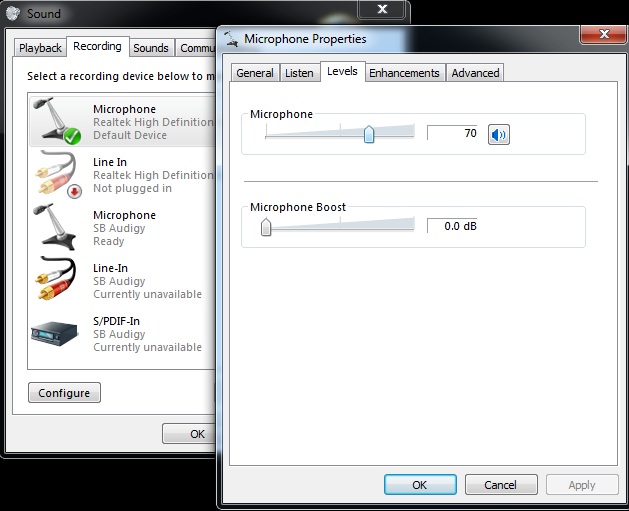
Click the Input tab in the SHOUTcast Source DSP window. The default input is Winamp, which streams whatever is playing in Winamp. For broadcasting with a microphone or mixer, select Soundcard Input and set it to 44100Hz, Stereo for best quality. Under Mic Input, select your microphone or line input and click Open Mixer to configure your soundcard recording settings.
 Expand
 Expand
 Expand
Go back to your Centova panel, access the Quick Links tab and listen to your stream from Your stream start page to verify everything is working correctly.
 Expand
You are now ready to use your streaming audio server and broadcast to your listeners. Happy streaming!
Common questions about setting up SHOUTcast DSP for live audio streaming with Primcast.